Getting Started
Install Agor, open the UI, and follow the onboarding wizard. Your first assistant will help you get your bearings and get everything else set up.
Install
Most users should start here. It’s the most universal path, and it’s the one the rest of the docs assume.
Requires Node.js ≥ 22.12 (install).
# Install Agor
npm install -g agor-live

# First run
agor init
agor daemon start
agor openFollow the onboarding wizard
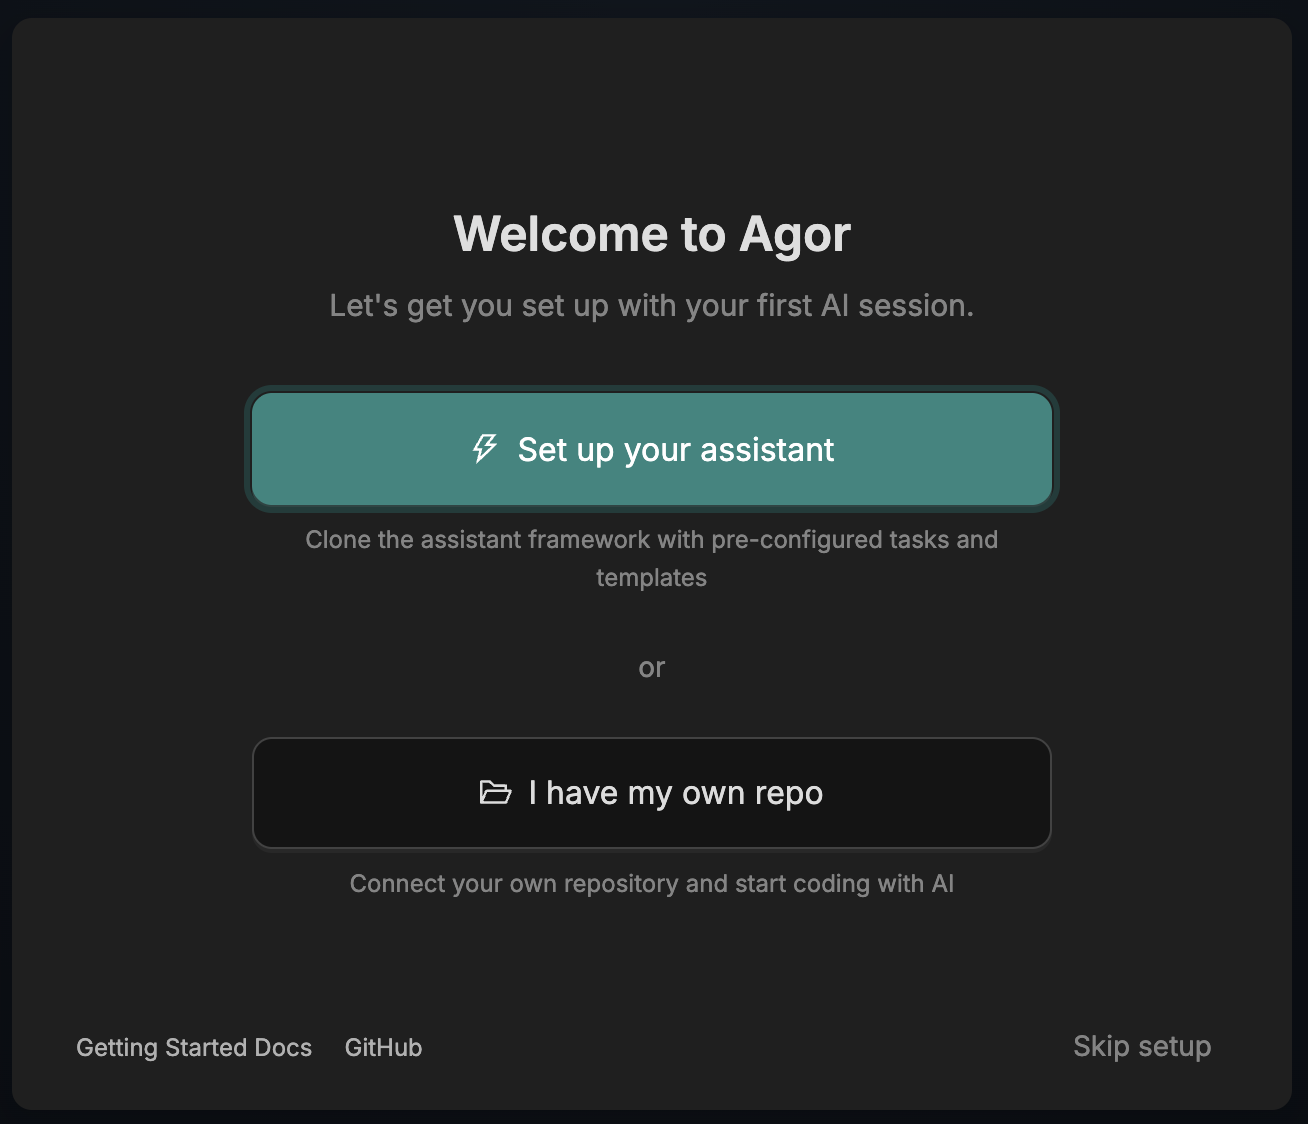
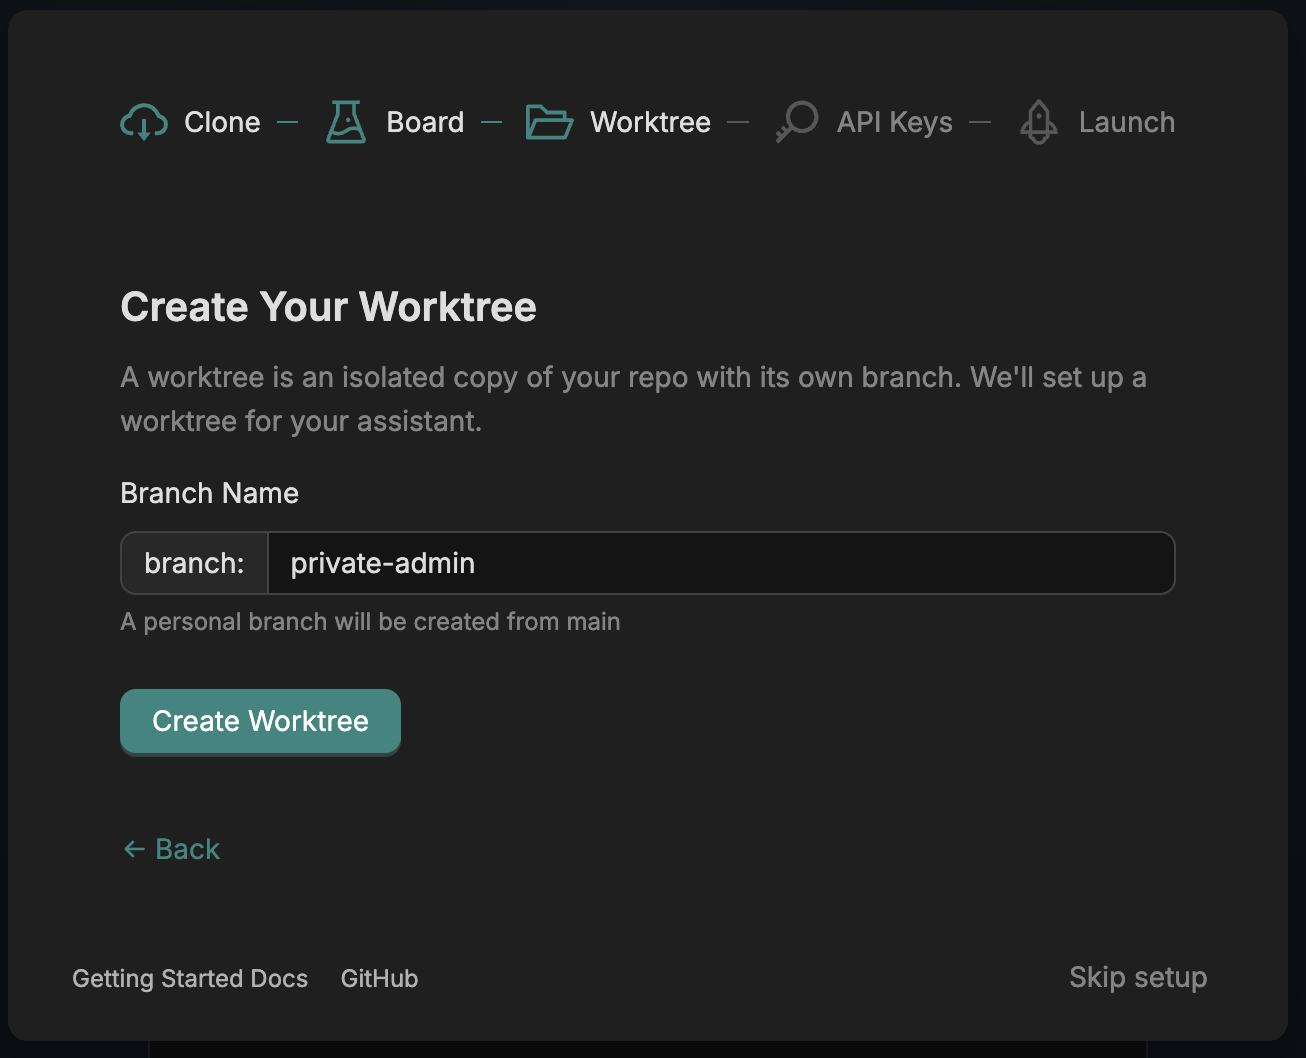
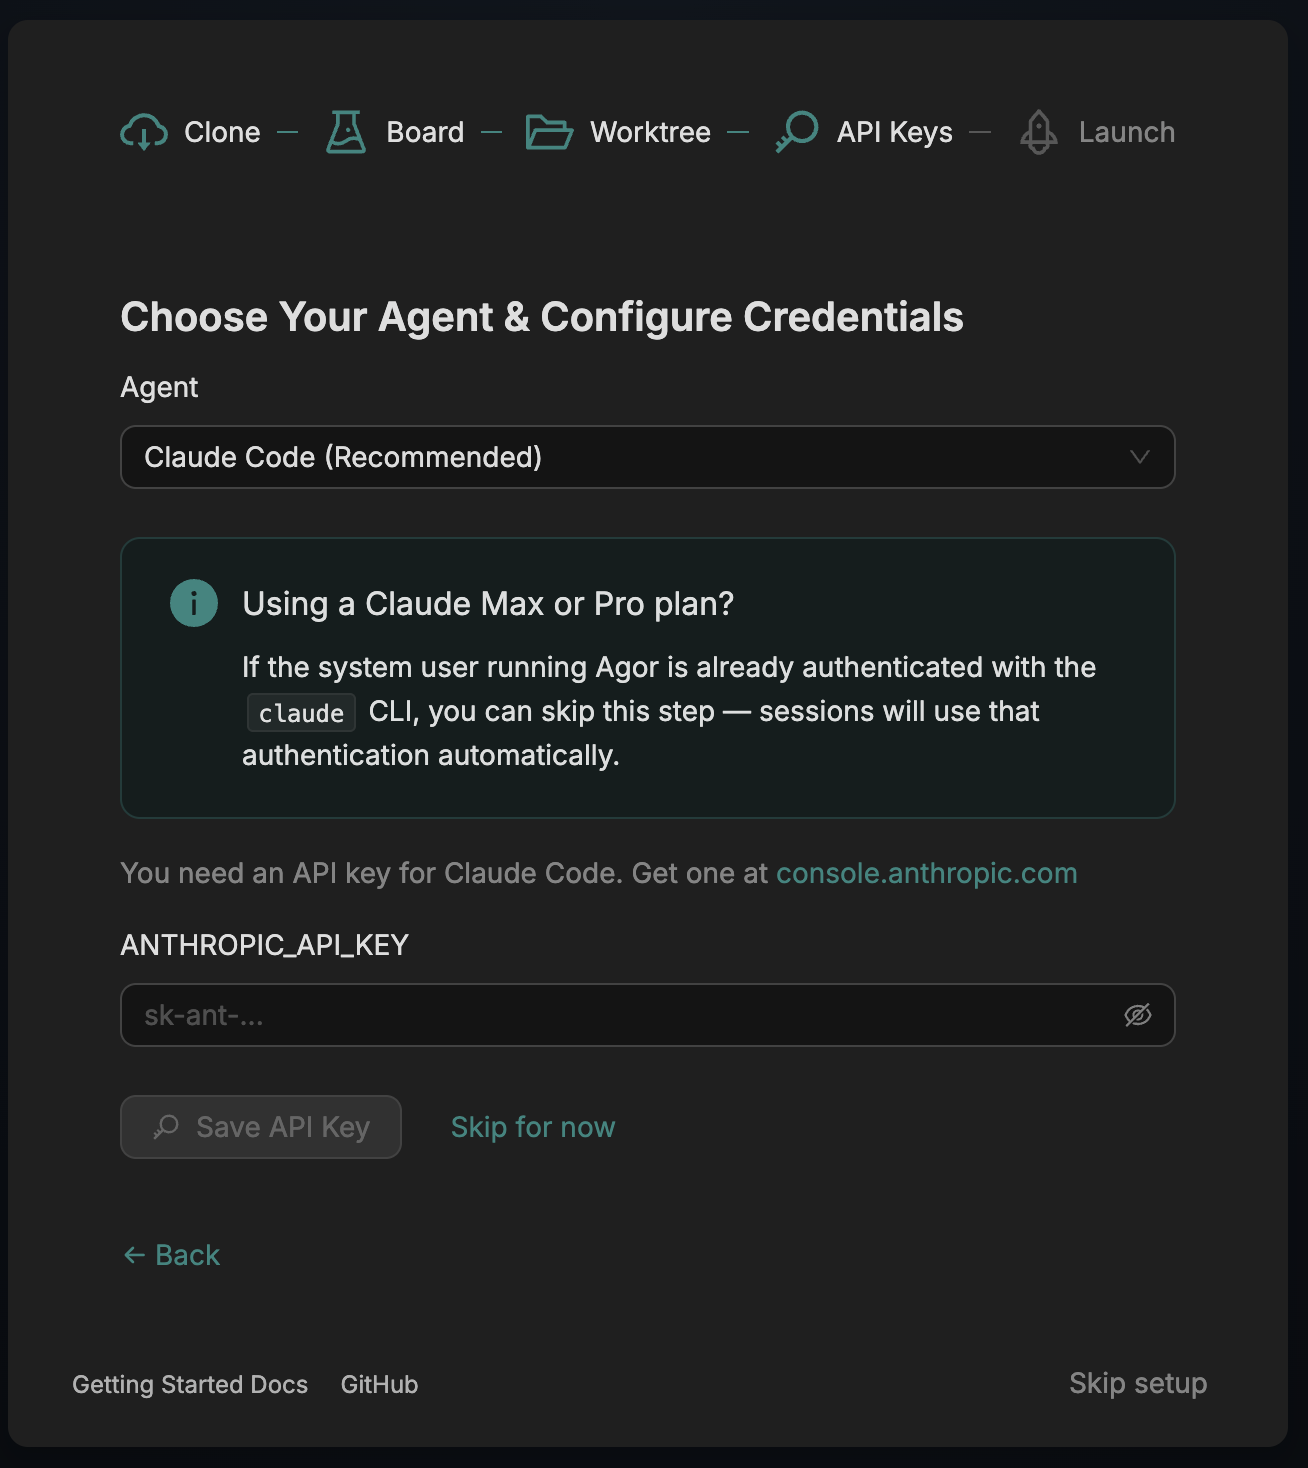
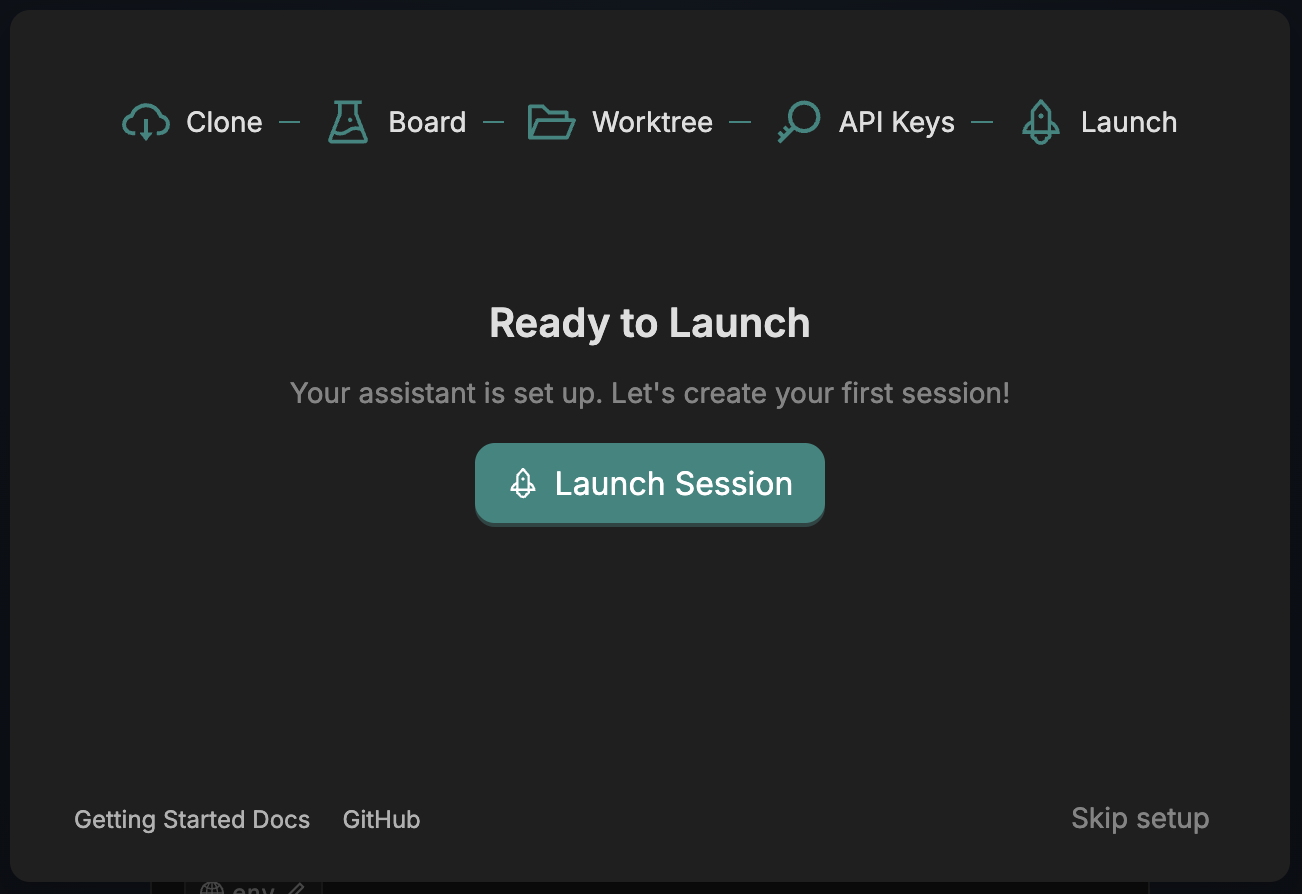
The first time you open the UI, the Onboarding Wizard runs. It picks between cloning the assistant framework repo or pointing at one of your own, then walks through Clone → Board → Branch → API Keys → Launch and drops you into a live session.
Once you’re in the session, your assistant introduces itself — asks for a name and emoji, who you are, and what you’d like to get started on. From there it can register more repos, set up boards, structure a workflow, or just be a thinking partner. Anything a user can do in Agor, the assistant can do too — it has full access to the Agor MCP Server.
Customize your install
Agor runs out of the box on SQLite as a single-user instance, but it’s designed to scale up:
- PostgreSQL backend instead of SQLite, for multi-user / team setups
- Multiplayer mode with branch-level RBAC and per-user permissions
- Unix-user impersonation so each Agor user’s sessions run as their own OS identity
- Docker Compose and source builds
- Custom config / database paths for non-default install layouts
For any of those, see Extended Installation. For credential alternatives (claude setup-token, codex login --device-auth, workspace-wide env vars), see Authentication.
What’s next
- Branches · Sessions & Trees · Boards & Zones — the core primitives
- Features Overview — Assistants, MCP, Rich Chat UX, Multiplayer, Environments, Scheduler, Cards, Artifacts
- Architecture — system design and the typed TypeScript client
Get help
- Discord — community support and discussion
- GitHub Discussions — questions and ideas
- GitHub Issues — bugs and feature requests
- Run
agor --helpfor the full CLI reference